Showing posts with label Guest Post. Show all posts

Friday, July 3, 2015

Guest Post at Polish Those Nails

I have a special guest post over at Polish Those Nails for today! I shared a macro preview on my instagram last night. Click here to check out my post in the Blogger Takeover series! While you are there you might as well check out some of Marisa's amazing freehand nail art.


I'll be back with some stamping for tomorrow!

Have you loved your cuticles today?

Monday, June 15, 2015

Guest Post from @swatchbucket

I have a guest post today from one of my nail buds, Samantha! We met through mutual indie nail loves, and we've been enabling each other ever since. Samantha "microblogs" on instagram (@swatchbucket) and I highly recommend following her lovely nails. You can always count on amazing swatches of jellies, crellies, and holos from this girl. And how does she keep them so durn long?! She must be a witch. Let's see what she has for us today!

~~~~~~~~~~

Hello, reader! I am Samantha of @swatchbucket on Instagram, and I am your guest blogger for Shelby today! She and I have been polish buddies for a good while now, and she's been a witness to my microblogging development over the past year. Shelby is such a lovely and encouraging person, and holy crap is she a (fabulously) ruthless enabler! She and I share a lot of polish loves. As a result of this, she has made me more HARE Polish crazed, and she is also to be blamed for my latest polish brand obsession, Renaissance Cosmetics. In exchange, I have tried to get her hooked on WingDust polishes. All three of these brands make absolutely stunning crelly glitter polishes, and since I know that she and I love a good crelly, I have decided to use such along with an accent nail. 


I started this mani off with two coats of Serumn No5 Ho No! and smoothed it out with two coats of KBShimmer Clearly on Top. This grey crelly is absolutely packed with metallic blue, red, yellow, and matte white microglitters and small circle glitters. The formula is lovely and almost completely opaque in one coat. The base also has blue shimmer that can look pink in some lights. The shimmer is much more prevalent in the bottle and on the nail without top coat. If you like textured polishes, I highly recommend not putting a top coat on this polish, because the blue/pink shimmer looks absolutely stunning as a frosty matte finish. With top coat, the shimmer provides a more subtle yet sparkly effect. You don't want Ho No! for the shimmer and glitter mix alone, though. You NEED it because it looks good with the light on AND off! Ho No! is one of Serum No5's many famous glow in the dark polishes. This one glows blue (forgive the poo glow in the dark shot further down). 


Things have to look jank before they look swank.

The glow in the dark effect looked especially really cool with my accent nail. After I did two coats of Ho No!, I topped it with KBShimmer Clearly on Top top coat and let it dry for about 30 minutes just to make sure it would hold up against nail vinyls. I also applied a layer of Ellagee's Lickity Split liquid latex around my nail to make clean up easier. Once the latex was dry, I applied an Up Your Nail Moroccan vinyl guide, snipped it to make it hug and adhere to my nail better (I have really curved nails), and applied a layer of Enchanted Polish December 2014 (blue holo full of blue glass fleck) on the bottom half of the nail and February 2015 (tomato red holo) on the upper half. I then sponged on another layer of the polishes and blended them by using a cosmetic sponge. Once I was satisfied with how it looked, I immediately pulled the vinyl guide off with tweezers and pulled off the liquid latex before topping it off with another layer of KBShimmer Clearly on Top.  


#swankshot

Glow shot! 

I'm so used to microblogging, so this was definitely a different experience for me. Thank you guys for having me! All shots were taken in natural lighting with my Samsung Galaxy S3. I *love* how this mani turned out, and the customers I dealt with at work really loved it too.

Polishes used
KBShimmer Basic Training
Serum No5 Ho No!
Enchanted Polish December 2014
Echanted Polish February 2015
KBShimmer Clearly on Top

Products used
Ellagee Lickity Split liquid latex
Up Your Nail Moroccan vinyl guides
cosmetic sponge

~~~~~~~~~~

Thank you so much got such an awesome post, Samantha! Didn't she do great? Make sure you check out @swatchbucket on instagram, I know you'll like what you see and give her a follow!

Have you loved your cuticles today?

Friday, January 16, 2015

Guest Post from Lavish Layerings

I am excited about a lot of things today. First, I have a four-day weekend! I have been working weird schedules for about a year and this is a very rare treat. I have already filled the days with house cleaning projects and volunteering with the Red Cross. Clearly I like to stay busy. Second, Jenny from Lavish Layerings has done a gorgeous mani to share with us! She is one of the most lovable bloggers I have had the pleasure to know in my polish adventures. She does gorgeous swatches and macros, and always has the latest and most amazing indies to share. Her pictures are always making me drool on my electronics. And she does a fair bit o' stamping...

~~~~~~~~~~

Hi everyone! I'm Jenny from Lavish Layerings and I'm so excited to be guest posting for Shelby this month! I have adored her blog and her nails for ages and she is a total sweetheart. Some of her signatures that I love are her brilliant use of accent nails and her subtle, yet very striking use of charms. Shelby and I share a few common loves. One of them is Pahlish, which will not be the focus of my post today, but it's definitely worth mentioning. Another is Hare Polish, which I knew I had to wear if I was going to be posting on her blog. The third thing is a certain MoYou-London plate that we both went absolutely bananas over, so today you get a combination of two of our loves in one post: Hare Polish and MoYou-London Fashionista plate 07.

MoYou-London's Fashionista plate 07 features some amazing damask patterns that look so regal! You could stamp these designs over anything and make it look classy. For the base of my design, I chose Hare Polish Love You To Pieces, which has a plum jelly base filled with red, gold, and white flake shimmer. Love You to Pieces is one of those polishes that I've had forever and keep meaning to wear, so I was glad to finally have an opportunity to put it on. The formula is more on the sheer side, so I decided to layer 2 coats of it over American Apparel African Violet for my base. Once it was dry, I stamped over it with one of beautiful damask designs from Fashionista plate 07 using Essie Penny Talks. I love how crisply Penny Talks stamps! If you are a stamper, you need it! I was really happy with the finished design because I thought the luxe stamping really compliemented the beautiful flakes in the polish. I even managed to get a few ever elusive natural sunlight shots of this look!


So thank you so much to Shelby for having me and I really hope that you guys enjoyed my mani!

~~~~~~~~~~

She knows me so well! I was doing a happy-dance in my computer chair when I saw this mani. If you don't own this amazing polish or MoYou plate, you are missing out (#sorrynotsorry). Jenny is always making me buy all the Pahlish, too haha. You can follow Lavish Layerings on most social media platforms, make you you check her out on your favorites!

Thank you for all the lovely things about this post, Jenny! <3

Have you loved your cuticles today?

Friday, November 14, 2014

Guest Post from Hey, Darling Polish!

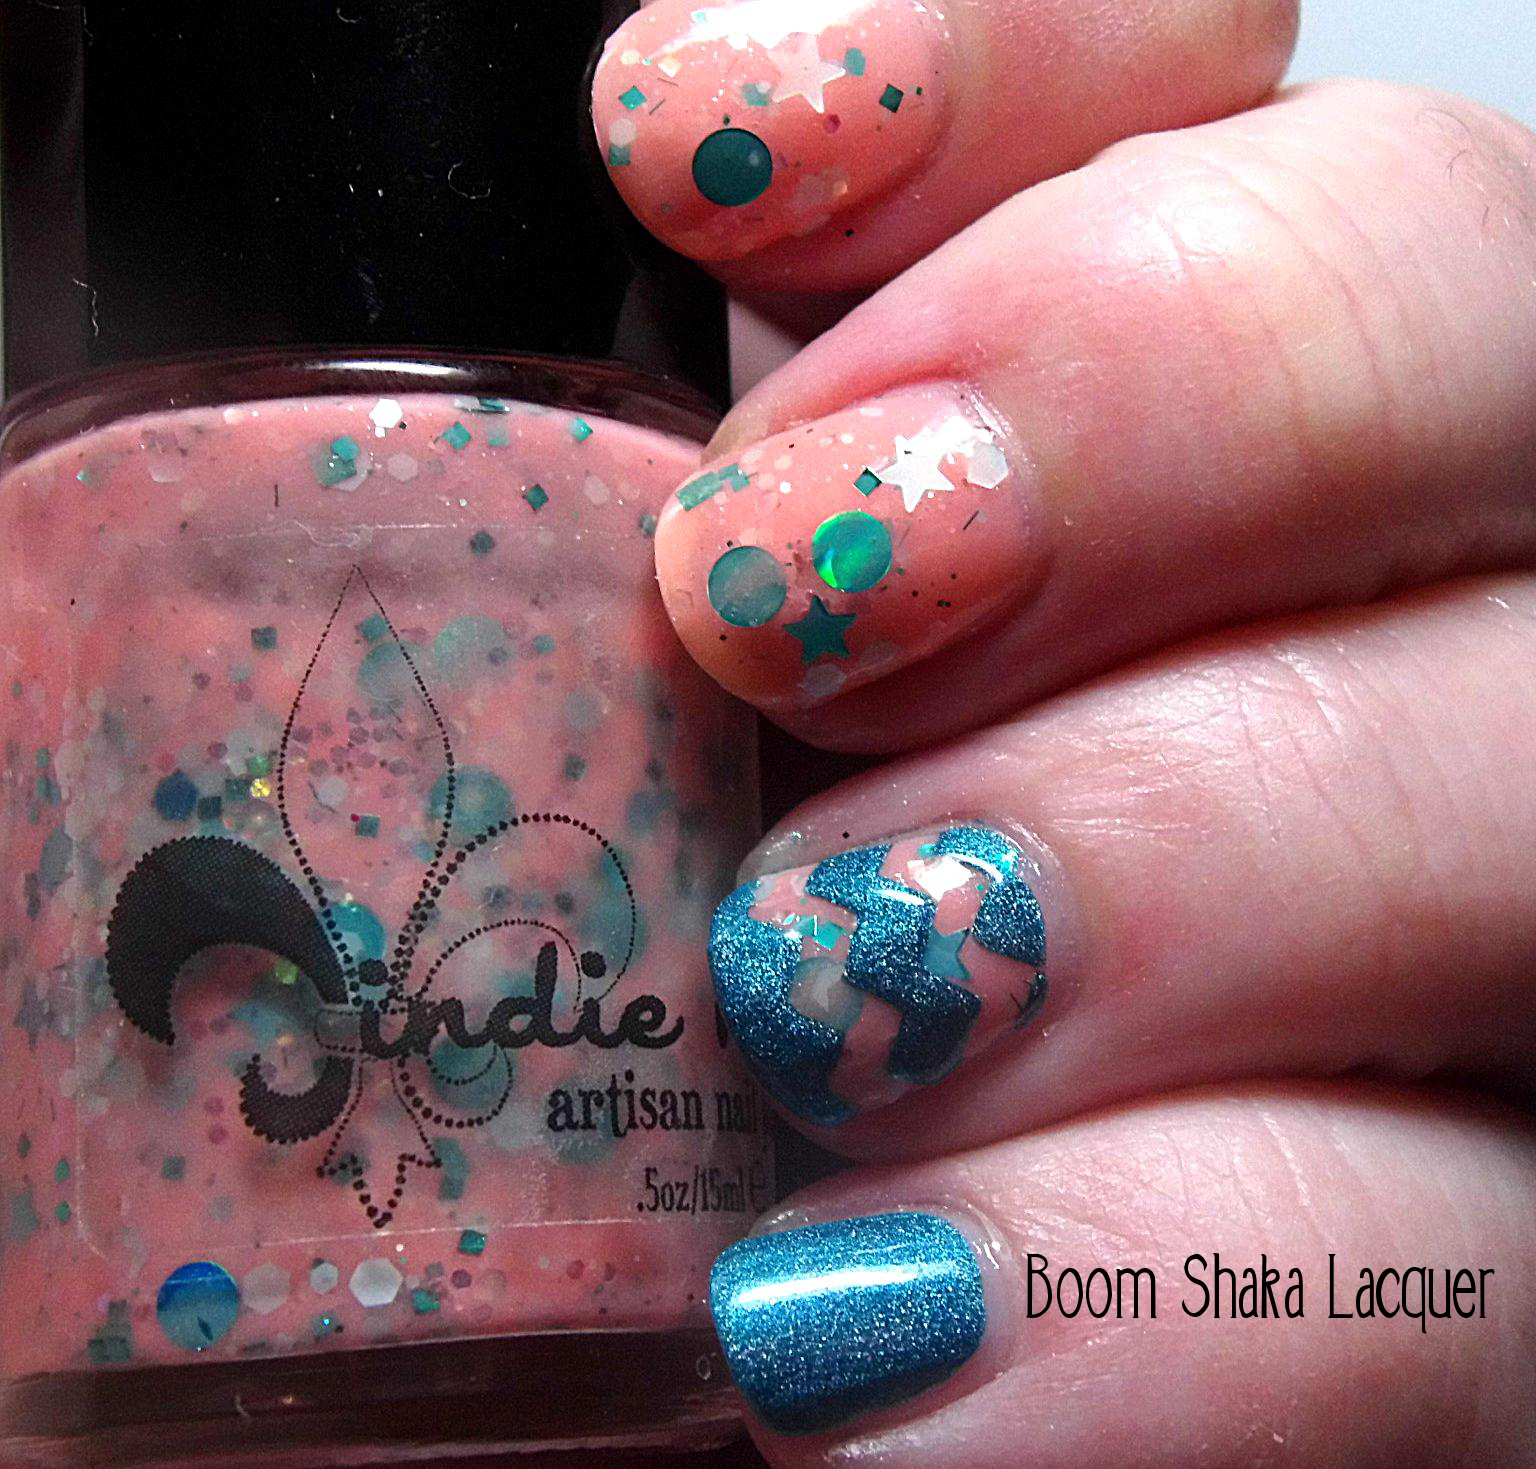
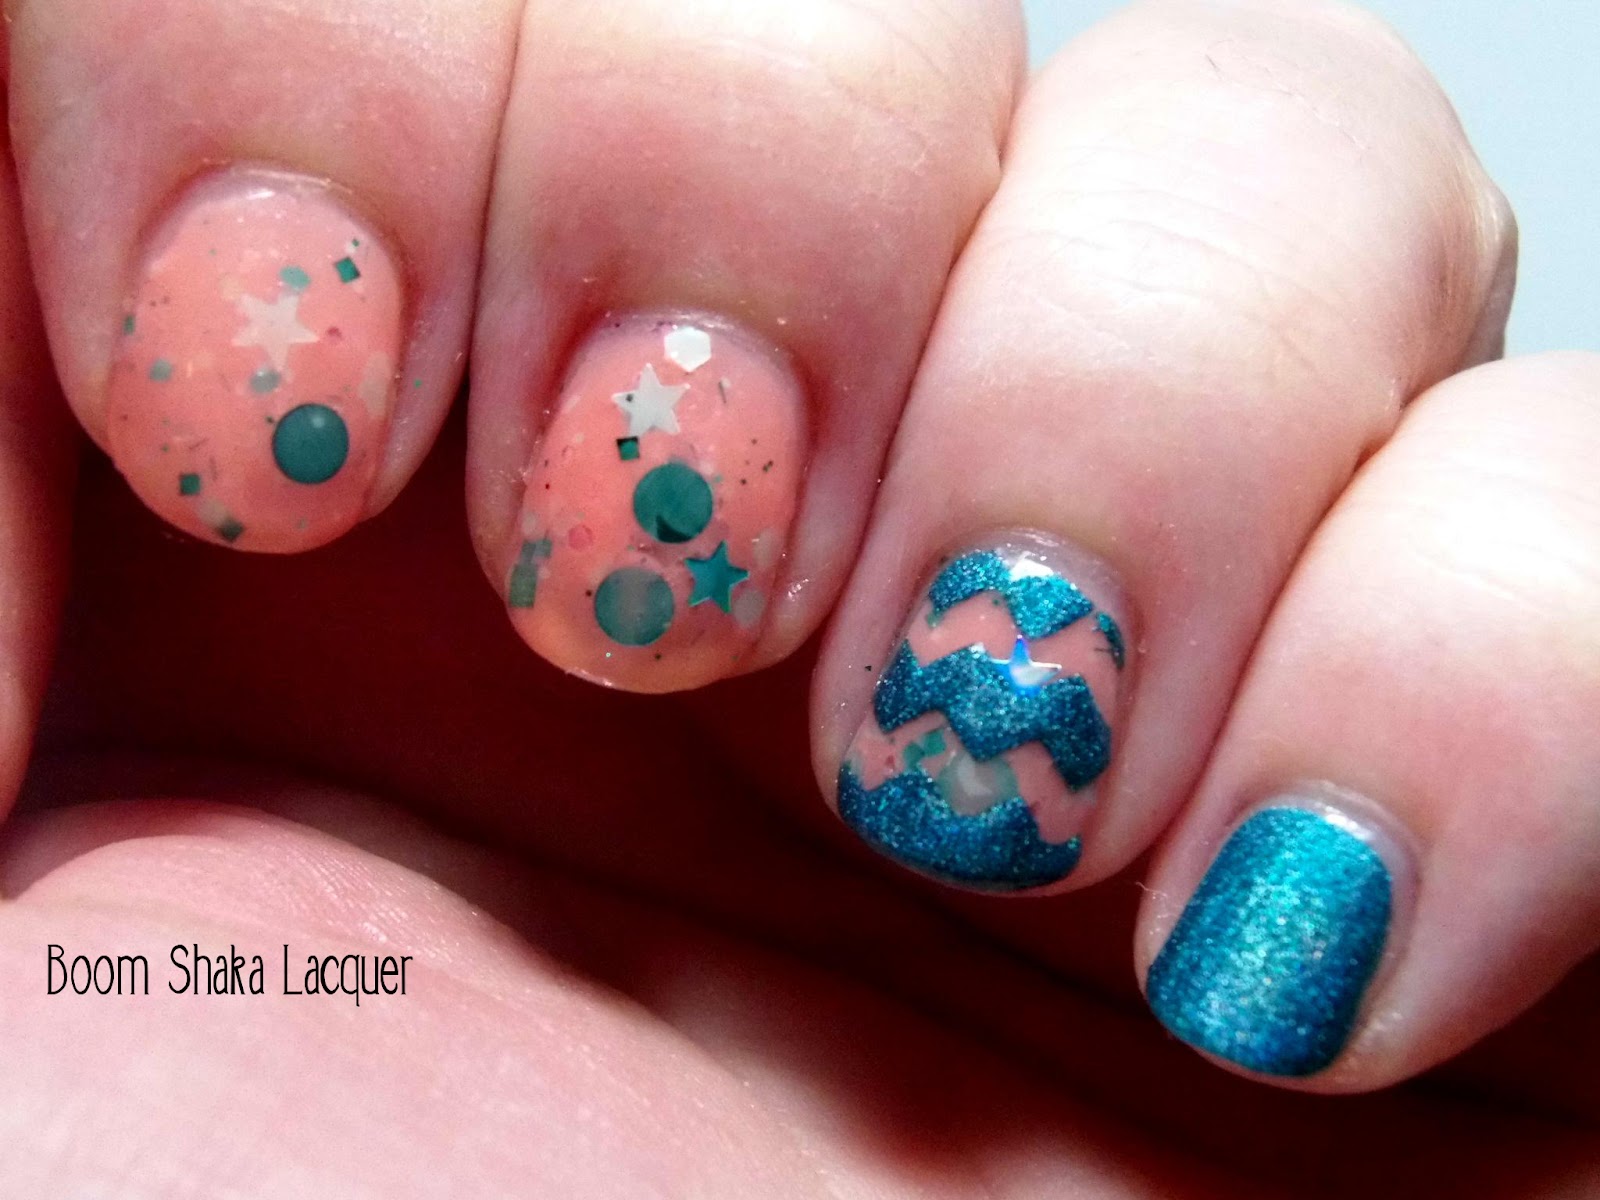
I kinda missed Hump Day Hare on my blog, but I did post A-Positive on instagram! I just got my American Red Cross vest on Tuesday and thought it was an appropriate polish to show off. I start one of my first shifts this weekend and I can't wait to get out in the trenches. I'm learning that the Red Cross can literally find a volunteer job for anybody who wants to volunteer no matter their skills or experience. Or, you know, just give 'em some blood! Okay, I'll stop being a social worker and be a nail blogger now.

October was such a fun month with all of the guest posts that I decided to keep having them once a month. Today's post is from Hey, Darling Polish! She always has these wonderful, whimsical little freehand designs that I can't get enough of. She also shows off a lot of lovely indie swatches which is always good with me!

~~~~~~~~~~

Hello lovelies!

I'm super excited to be here posting for Shelby Lou today! Funny story, she actually asked me to write a guest post for her back in September for part of her one year blogiversary celebration but I completely missed the message because Facebook sent it to my "other" folder. I didn't even know that folder existed! Not cool Facebook, not cool haha. Welp, at least I know now and I still get to write a post for you all!

A quick, little bit about me, my name is Marisa and I run the blog, Hey, Darling Polish!.  I love doing nail art, indie polish, and fun colors.

So, lets get onto the nails!

nails, nail art, nail polish, indie, indie polish, indie nail polish, hare polish, flowers, floral, hey darling polish


nails, nail art, nail polish, indie, indie polish, indie nail polish, hare polish, flowers, floral, hey darling polish

Here's what I used:


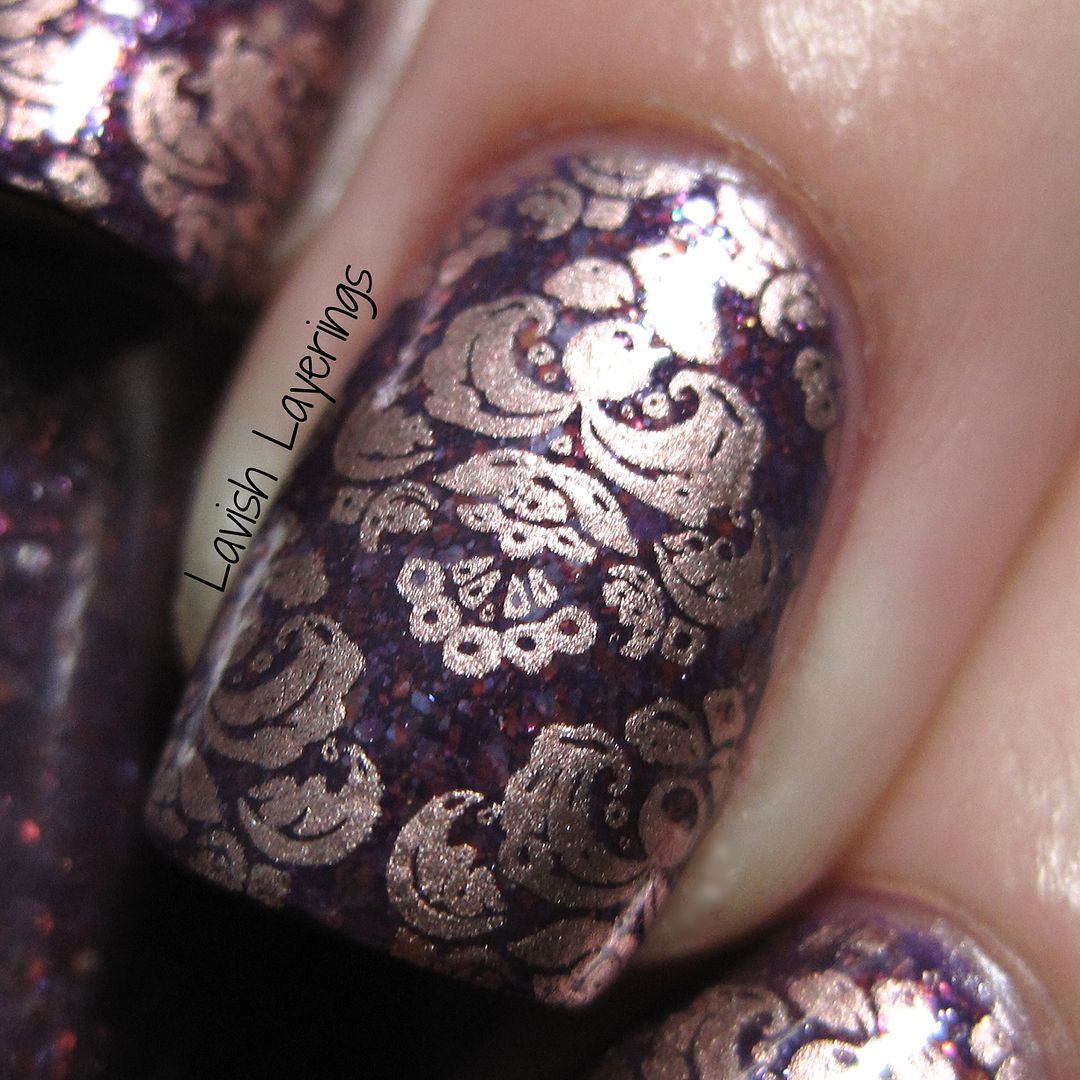
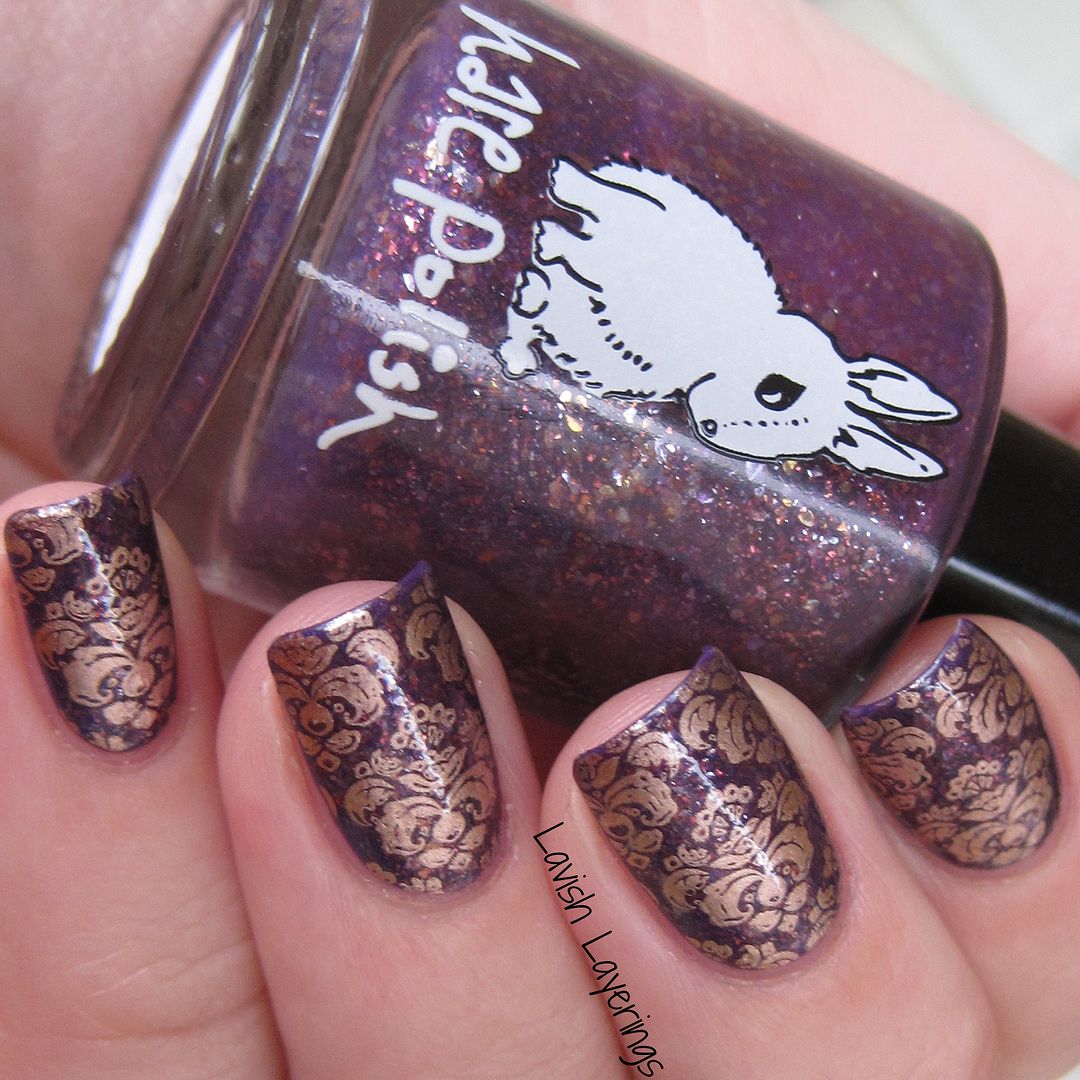
I know that I had to use one of my Hare Polishes for today's post because I mean, Shelby is the queen of Hare Polish! I always love reading her Hump Day Hare posts even if they make my wallet cry. I don't own that many but my little collection keeps on growing and I'm not complaining (:

nails, nail art, nail polish, indie, indie polish, indie nail polish, hare polish, flowers, floral, hey darling polish

These nails started with two coats of Magic Mist. When that had dried, I used the white acrylic paint and my detail brush to paint on the flowers. The inner dots were done with the grey paint and the same brush. Everything was sealed in with a layer of HK Girl.

nails, nail art, nail polish, indie, indie polish, indie nail polish, hare polish, flowers, floral, hey darling polish

I really love how these turned out and I got a lot of compliments on them. Hopefully you guys enjoy them as well! Thank you Shelby Lou for letting me taking over your blog for the day! 

-Marisa! (:

~~~~~~~~~~

Thank you so much for your post today, Marisa, I'm glad I still got to have your nails on my blog! These flowers are completely adorable and I love them over this polish. I'm so glad you chose to use a Hare, and I promise to continue making your wallet cry because I only believe in enabling when it comes to polish ;-)
Make sure you follow Hey, Darling Polish! to see all of her lovely nail art!

Have you loved your cuticles today?

Monday, November 3, 2014

October Guest Review

Wow, October was such a busy month for me! Thank you to everyone who participated in my First Blogiversary Giveaway. I am verifying entries as fast as I can and plan to announce winners on Wednesday. I'm also doing a major destash, check out my Pinterest Blog Sale and Make-Your-Own-Grab-Bag if you're looking for some new pretties cheap! You can email me at shelbylounails AT gmail DOT com.

I wanted to do a compilation of all my lovely guests from October who helped me celebrate. I plan on having guests more regularly and reader manis in the future!

Be Happy And Buy Polish

Dagadelic

Boom Shaka Lacquer

The Dalai Lama's Nails


Will Paint Nails For Food

JoyRSerio

The Polish Playground

Polished To Precision

Thank you everyone and I look forward to sharing many manis with you all!

Have you loved your cuticles today?

Friday, October 31, 2014

Guest Post from Polished to Precision

Happy Halloween! I did my Halloween wine tour a couple weekends ago to celebrate, anyone else have any fun plans? I have one more guest post this month to celebrate my one year blogiversary. If you haven't entered my giveaway yet make sure you do for your chance to win some of my favorite indies. Tell a friend, too!

Today's post is from Tiffany at Polished to Precision. Her nails are my spirit animal. Flawless swatches and lots of indies, that's how she rolls. I always enjoy seeing what she does from plain old swatches to nail art. Let's see what she has for us today!

~~~~~~~~~~

Hi there Polished Babes! I am Tiffany from Polished to Precision. I am excited to be here sharing a post with you all today. Shelby is an absolute sweetheart and super talented lady! Aren't her nails always flawless? Whether she's doing a swatch and review post or some sophisticated nail art, Shelby certainly brings her 'A' game with each and every look. Thanks for much for inviting me to your blog dear!

I can be a bit of a rambler, so let's get right into the look I created for you all. I know Shelby really loves Pahlish, so I knew that would be my starting point for the manicure. I decided to pull out a pretty that has been sitting in my untried box since I received it. Pahlish Over the Rhone is described by the brand as "a dusky navy jelly with metallic silver flakes and very soft silver shimmer." This is one of the Bespoke Batch series that Pahlish releases weekly. It's one of the most coveted polishes they've released. I missed it when it was first release, but thankfully they launched it for a short preorder and I was able to snag one. #winning I used two coats and topcoat (KBShimmer Clearly on Top) on my thumb, pinky, and index fingers. I absolutely love the depth of this beauty!

Polished to Precision for Shelby Lou Nails
Pahlish Over The Rhone, KBShimmer PT Young Things, Zoya Ryan, Nail Vinyls

For the ring and middle fingers I used KBShimmer PT Young Thing, a silver holographic polish with a perfect formula. I used two coats and topcoat. For the design on these nails, I used the KBShimmer wavy nail vinyls. Zoya Ryan (a deep navy blue creme) was the perfect match to the base of the Pahlish, so I added one coat and immediately removed the vinyls. Topcoat was added to seal the deal.

Polished to Precision for Shelby Lou Nails
Pahlish Over The Rhone, KBShimmer PT Young Things, Zoya Ryan, Nail Vinyls

I really like how this came together! I am no nail artist my any stretch of the imagination, but I can almost always pull off a look using nail vinyls. LOL! Anyway, I hope you like the look I created. Thank you for taking the time to read along today. If you ever have a moment, please stop by and check out me out at Polished to Precision

Polished to Precision for Shelby Lou Nails
Pahlish Over The Rhone, KBShimmer PT Young Things, Zoya Ryan, Nail Vinyls
Smooches!!
Tiffany

~~~~~~~~~~

Wow, I love this look! Done with three of my favorite brands no less. Not gonna lie, I fainted a little when I saw these, especially because of Over The Rhone. I am so impatient with vinyls and end up mussing my mani, I really enjoy the look though. Thank you for all of the kind words, Tiffany, and for posting for me today!

Have you loved your cuticles today?

Wednesday, October 29, 2014

Guest Post from The Polish Playground

There is still time to enter my 1st Blogiversary Giveaway but it's winding down! 

I am busy obtaining my new car today, but I do have a guest post is from Lisa at The Polish Playground! There are a few things I love about her. The first is her nail shape. She proves you don't have to have long square nails to have pretty nails, let alone be a blogger! In my opinion she is always rockin' it with some pretty nail art, from the simple to more intricate. Lisa is also a huge supporter of the nail and blogging community. She always has a kind word for everyone and is so encouraging, and I am a fan of people who build others up. I am so pleased to have her here today, let's see what she has!
~~~~~~~~~~

Hello everyone! I'm Lisa from The Polish Playground and I'm so honored to be doing a guest post for Shelby Lou today. I've been a reader of hers for a while and was so excited when she asked me to guest post for her. To celebrate her blog anniversary, I decided to create a manicure with a fun accent nail to it. She is like the queen of accent nails so I wanted to do one to honor her.

The Polish Playground at Shelby Lou Nails
OPI I'm Suzi & I'm a Chocoholic, Nostalgic Nail Lacquer Sloth, China Glaze Prism
Bow from Born Pretty Store
I used OPI I'm Suzi & I'm a Chocoholic and Nostaglic Nail Lacquer Sloth on all the nails except the ring. For the ring, I used China Glaze Prism. I created the accent nail using striping tape. I applied OPI I'm Suzi & I'm a Chocoholic on top and then peeled the tape off when the polish was still wet. I also applied a bow stud from Born Pretty Store. Finished with Glisten & Glow HK Girl Top Coat.


The Polish Playground at Shelby Lou Nails
OPI I'm Suzi & I'm a Chocoholic, Nostalgic Nail Lacquer Sloth, China Glaze Prism
Bow from Born Pretty Store

Thank you again to Shelby Lou for having me guest post today on your blog! Happy blog anniversary to you and I hope everyone has a great day. If you want to follow me on my other social media sites, check me out on FacebookTwitter, and Instagram.

The Polish Playground at Shelby Lou Nails
OPI I'm Suzi & I'm a Chocoholic, Nostalgic Nail Lacquer Sloth, China Glaze Prism
Bow from Born Pretty Store

~~~~~~~~~~


Queen of accent nails? I'll take it! Thank you so much for posting for me today,Lisa, this is such a great fall mani and the accent is amazing. Make sure you follow The Polish Playground for more beautiful manis and inspiration for your own nail art, you'll be glad you did!

Have you loved your cuticles today?

Monday, October 27, 2014

Guest Post from @JoyRSerio

October has been nutty for me, what is the deal? Last week I'm all minding my own business, planning on blog stuffs and training for the Red Cross... then my husband informs me I have to go test drive a couple cars he found. Since my lease is up in January I figured I wasn't allowed to whine about it. I know I'm lucky because he knows a lot of local people in the car business from working in it himself. His negotiation skills are so impressive he has legit been offered a job after talking down one of my past leases. It looks like I am going to be getting a 2007 Lincoln MKX in the deal of a lifetime. We need a larger vehicle with all the home improvement stuff we do and it's AWD for the snow. I'm not sure how I feel about it though. I've always driven cute little cars (okay except for that one time I had an Oldsmobile) and now I am going to be that obnoxious SUV driver taking up the whole road. I am also terrified of breaking it since I will be paying on it approximately forever. And does it look like a pimp-mobile to anyone else? 

Make sure you enter my 1st Blogiversary Celebration Giveaway while you're here!

Today I have a guest post from my real-life nail polish bestie, Joy. We actually met because she works with my mother-in-law and it ends up we actually enjoy each others' company. And hey, we can talk about nail polish for hours! I met her around the same time I was thinking about starting a blog, and she encouraged me to just go for it. So I did! She has been a great source of support and a wonderful friend. I'm so excited to see her nails in blog format.

~~~~~~~~~~


So, first of all, I want to congratulate my girl Shelby on her one year Blogiversary!  I was lucky enough to meet my nail obsessed friend through a co-worker and am so proud of what she has done in the first year of her blog!

I am not a blogger, but am thoroughly nail obsessed. I prefer the Instagram thing (feel free to follow me @JoyRSerio) as I just love posing pictures. For those of you that don't know me, I am an indie whore. I became obsessed a little over two years ago and ever since rarely buy mainstream. I'm also a Disney geek and Halloween is one of my favorite holidays of the year. So when I was shown the "Halloween at the Park" duo by Sweet Heart Polish and Polish TBH, I knew I had to have it and bought it right away!

Both of these indies are new to me. I happened to have one of each brand in my untrieds and I'm going to have to get those on my nails after trying these out!  I bought the duo through Sweet Heart Polish and I had these in my hot little hands three days after ordering (even though they shipped from California to NYS). Quick shipping is huge to me, once I need a polish, I NEED THAT POLISH! I'm sure every single one of you can relate.

I absolutely loved everything about these polishes. Mickey's Sweet Treat is a clear base packed with white Mickey heads and an assortment of white, yellow and various orange glitter stars, hexes, squares and circles. My husband said it is the perfect candy corn polish. It looks amazing both with shiny top coat and matte, but. I prefer the matte.


Sweet Heart Polish - Mickey's Sweet Treat
"Halloween at the Park" duo with Polish TBH

Sweet Heart Polish - Mickey's Sweet Treatwith Butter London Matte topcoat
"Halloween at the Park" duo with Polish TBH

Not So Scary Halloween had me sold on the name! Halloween at Magic Kingdom is one of our favorite events! Polish TBH nailed it here! From the black jelly to those orange glitters to the. Mickey heads and everything in between, it represents the party perfectly!


Polish TBH - Halloween at Magic Kingdom
"Halloween at the Park"duo with Sweet Heart Polish

Polish TBH - Halloween at Magic Kingdomwith Butter London Matte topcoat
"Halloween at the Park"duo with Sweet Heart Polish

Both polishes were easy to apply, turning the bottles upside down for ten minutes prior to painting helped me avoid "fishing" for Mickey glitter. The only drawback to this duo is I now wish I was going to Mickey's Not So Scary Halloween Party this year! It's really not so scary!

This duo is priced at $20 plus shipping and can be found at:
www.sweetheartpolish.com
www.polishtbh.bigcartel.com

~~~~~~~~~~


Thank you, Joy, for taking the time to do a guest post for me! I love these Halloween polishes and that I got to see a new-to-me brand on my blog...maybe she will let me borrow them next October. Joy microblogs on instagram, make sure you check her out. She mostly posts indie polish (macros and matte!) as well as some cats, selfies on good-make-up-and-hair days, sports, and food pics sprinkled in. I am so glad to have met this girl and I hope you enjoyed her nails as much as I do!


Bonus mani pic!
Niagara Hallowine Trail 2014
Have you loved your cuticles today?

Saturday, October 25, 2014

Guest Post from Will Paint Nails For Food

If you haven't entered my First Blogiversary Celebration Giveaway yet, make sure you check that link!

Today's guest post for my 1st blogiversary celebration is brought to you by Will Paint Nails For Food. I have been a fan of Meghan's art for quite some time. Admiring Meghan's nails, to me, is like going to a fine art museum, looking at the beautiful works of art and knowing full well you ain't gonna be paintin' the Mona Lisa any time soon! Meghan actually kind of helped me break in to blogging. She had a "From The Readers" series last year and I submitted a skittle mani (see it here! And I fangirled for like a week haha). The photo is crap and the angle makes my hand look really fat, but hey, it was a start, so thank you, Meghan!


~~~~~~~~~~

Hi everyone! My name is Meghan and I have a blog called Will Paint Nails for Food. I do both nail art and swatches, and if I had to say what my focus is, it would be freehand nail art. I was very excited when Shelby invited me to do a guest post. I've known her even before she started her blog, and she's one of the very few people in the blogosphere that I've actually met personally! And she's incredibly nice and talented! So thank you Shelby for having me here.


Falling Leaves
Will Paint Nails For Food for Shelby Lou Nails

It's been getting chillier here in Toronto, and I haven't done any fall nail art yet, so that was the motivation behind this design. I wanted to keep things simple, therefore, I decided to have a plain background, with some falling leaves that were outlined for detail. I also wanted to keep the focus on the leaves and the shimmery polishes I used to paint them. 

Falling Leaves
Will Paint Nails For Food for Shelby Lou Nails

I started with a base of OPI My Vampire is Buff. If you follow my blog, you know I'm kind of obsessed with this polish. Unfortunately this particular bottle was not my friend, because it took 4 coats to get full coverage. I painted the leaves in with Renaissance Cosmetics Portland, Runnymede, and Spadina, and Zoya Beatrix. The outlines were done with Van Dyck Brown acrylic paint and a fine detail brush. It's a really good colour for when you want dark lines or shadows, but don't want to use black. I topped it off with KBShimmer Clearly On Top and Cult Nails Wax That.

Falling Leaves
Will Paint Nails For Food for Shelby Lou Nails

I really like the simplicity of this design, but I kept questioning whether I should add more to it. In the end I decided to keep things as is. What do you think? Do you like it as is, or should I have added more details or a background?

Falling Leaves
Will Paint Nails For Food for Shelby Lou Nails

Thanks again Shelby for having me here! And congrats on your first year of blogging!

Falling Leaves
Will Paint Nails For Food for Shelby Lou Nails
~~~~~~~~~~

These leaves are perfect and I love them so hard, Meghan! Or should I say, Dr. Meghan--yup, she now has her PhD and we must call her Dr. It was so lovely to meet up with her earlier this year and talk about polish and life, and she is as nice as her nails. If you haven't been following Will Paint Nails For Food... well what are you waiting for??

Have you loved your cuticles today?

Tuesday, October 21, 2014

Guest Post from The Dalai Lama's Nails

I meant to have this posted Monday, however wine trips are not conducive to blogging--but check out my nails from Saturday on instagram!

Make sure you enter my First Blogiversary Celebration Giveaway if you haven't already. It ends November 2nd, tell a friend!

Today I have a guest post from The Dalai Lama's Nails! I have to say I feel a special affinity to this blog name. My birthday is April 8th and this is also the accepted birthday of the Buddha. And so, my high school World History teacher (who was totally awesome) dubbed me "The Shelby Lama." It almost became my blog name. When it came time to ask for guest posts I knew I had to ask this amazing lady, and I almost fell off my chair when she had the time to accept. Hannah is one of the bloggers I go to for amazing freehand nail art and today she does not disappoint!


~~~~~~~~~~


Hi there everybody! My name is Hannah, and I blog over at The Dalai Lama's Nails. I am so honored that Ms. Shelby Lou asked me to guest post for exciting blogiversary! A blogiversary is a very exciting thing (I'm approaching a blogiversary, myself!). I've absolutely loved getting to know Shelby, and her nails are divine. I thought I would honor her blog by recreating some of her nail art that I really love. Shelby did some really cool nude and neon zebra stripes a while back that I adore. I'm not much of a stamper, preferring generally to freehand. This is my take - freehand nude and neon zebra stripes!


I began by applying two coats of OPI My Vampire is Buff, which is one of my favorite nude shades for nail art. Then I used a small detail brush and OPI A Definite Moust-Have to create the zebra stripes. I top coated with KBShimmer Clearly on Top.


A big thanks to Shelby Lou for having me as a guest post today! If you want to check out my work, you can head on over to The Dalai Lama's Nails


~~~~~~~~~~

So I am totally in love with these nails! I am a stamper myself, but these freehand neon stripes over the best nude ever... *drool*. Teach me your secrets, Hannah! If you are not following her already, you are welcome. The Dalai Lama's Nails is also about to celebrate three years of nail blogging which is quite an achievement! Thank you so much, Hannah, for doing today's post for me and making them so perfect :-)

Have you loved your cuticles today?

Friday, October 17, 2014

Guest Post from Boom Shaka Lacquer

Hey hey! It's been a crazy week for me but I've got another guest post to wrap it up. Karel from Boom Shaka Lacquer and I started blogging about the same time last year. We talked a lot in polish groups and she is a lovely lady, I'm so happy to have her on the blog today!

So there are actually TWO giveaways for our blogiversaries going on that you need to check out:
Boom Shaka Lacquer One Year Blogiversary Celebration
Shelby Lou Nails First Blogiversary Giveaway

Okay, let's see what Karel has for us today!

~~~~~~~~~~

Hi!  My name is Karel (or Relly) and I am the blogger and head nail polish addict over at Boom Shaka Lacquer.  I was excited when Shelby asked if I wanted to do a guest post to help her celebrate her Blogaversary month.  It just so happens that it’s MY Blogaversary month too because she and I started about the same time!  

I decided I would share a fun Jindie-cure with ya’ll since it’s a brand that both Shelby and I adore!  Without further ado I give you a cute skittlette (something that Shelby inspires me with, her gorgeous skittlettes!) featuring Jindie Nails Fantastical and Blue & Green’s Love Child.


Jindie Fantastical Skitlette.jpg
Boom Shaka Lacquer for Shelby Lou Nails
Polishes used:   Tip Top - Toughen Up Basecoat; Jindie Nails - Fantastical and Blue & Green’s Love Child; Gothic Gala Lacquers - Smooth Me Over; Digital Nails - Ain’t Nobody Got Time for That Topcoat


For this skittlette I put three thin coats of Fantastical on my fore, middle, and ring fingers. Fantastical is a bright coral crelly based polish filled with holographic, metallic, and satin glitters in white and teal.  I’m particularly fond of the large teal holographic dots and the white satin stars!  Then I put ONE coat of Blue & Green’s Love Child on my pinkie and thumb. Blue & Green’s Love Child is a gorgeous teal holographic polish.  Like all Jindie holos they aren’t what I would call linear but they are extremely unique and rich looking.  After that I used some YouPolish chevron decals as masks I created the chevrons on my ring finger.


Jindie Fantastical Skitlette2.jpg
Boom Shaka Lacquer for Shelby Lou Nails
Polishes used:   
Tip Top - Toughen Up Basecoat;  Jindie Nails - Fantastical and Blue & Green’s Love Child; Gothic Gala Lacquers - Smooth Me Over; Digital Nails - Ain’t Nobody Got Time for That Topcoat

Let’s talk about how awesome the formula is on Fantastical!  Jindie does crelly-based glitter polishes like no one’s business.  I decided the first time I wore this that I would love this type of polish forever.  Now it did take me a little while to become proficient at applying them but with a little patience and a couple of tricks anyone can do it!  I start with a thin layer as a base for color, I don’t worry about glitter at this point, if some gets there cool if not no worries I’m going to get glitter later!   Then I apply a second thin coat taking care to make sure that any glitters that are deposited are where I want them, if they aren’t I might nudge them a bit with my brush.  Sometimes I can get away with two coats this is a lighter colored crelly so to smooth things out I did another thin coat and much like the first coat I’m not so worried about getting a ton of glitter on this one I just want to even everything out.  Voila that’s all there is to it!  I top it off with a nice thick topcoat or in my case I went with a glitter smoothing topcoat and a quick dry for ease and it’s smooth as glass and just gorgeous!

Polishes used:  Tip Top - Toughen Up Basecoat; Jindie Nails - Fantastical and Blue & Green’s Love Child; Gothic Gala Lacquers - Smooth Me Over; Digital Nails - Ain’t Nobody Got Time for That Topcoat

You can get Jindie Nails polishes from several fine stockists but the easiest way I’ve found is straight from her website. You can also follow Jindie on Facebook and Instagram. So, hey if you liked this you can also keep up with me on Facebook and Instagram as well!  

Thank you for allowing me to take over your blog for a brief moment Shelby and Happy Blogiversary!

~~~~~~~~~~

Karel got it right, we both love Jindie! This is a brilliant combination and totally makes me want Fantastical so I can make this mani myself. Thanks for helping me celebrate and happy blogiversary to you, too, girl!

Have you loved your cuticles today?

Monday, October 13, 2014

Guest Post from Dagadelic

I had a lot of my own posts I wanted to get done last week but this week I'm back with another guest post! Today I have the lovely Dagmara of Dagadelic. We met through a mutual friend and when I finally checked out her nails I was like, how did I not know this girl sooner?! She always does such lovely manis full of stamping, freehand, and, of late, watermarbles. On to the mani!

~~~~~~~~~~

Hey there! My name's Dagmara and I've made my way over from my own little space in the interweb - Dagadelic. I'm honoured to be guest posting for Shelby who has been a tremendous source of support and nail inspiration. I wanted to come up with something snazzy to help her celebrate her 1 year blogiversary (congrats girl!) so I pulled out an old favourite and a new nude polish.


L'oreal - Doutzen's Nude // A England - St. George
MoYou London - Fairytale Plate 05


I've been lusting over the Nude Collection L'Oreal did during the summer but every time I went to go get some they were sold out. Then a miracle struck and I found a few bottles in the sale bin. This nude is a light dusty purple that reminds me of the Zoya Naturel collection. 3 thin coats made for perfect coverage. I stamped with my all time favourite polish to stamp with - St. George. So much sparkle in the sunshine *.* 


And with that I'll be off! Let me know what you think in the comments!
Thank you so much Shelby for the opportunity to guest post.

If you want to see more of my manicures feel free to go over to my blog: Dagadelic.
I'm also on Facebook, Instagram, Bloglovin, and Pinterest.
xo, D.

~~~~~~~~~~

My friends know me so well--Nude with some colorful, holographic stamping? Yes please! Thank you so much for the amazing mani (St. George is a favorite of mine, too) and the kind words.
Dagadelic is also celebrating her two year blogiversary this month, wow! You can check out her post and enter her giveaway here for a $50 gift card to a polish e-tailer.
While you're at it, don't forget to enter my 1st blogiversary giveaway here for your chance at some Pahlish Bespokes and HARE polish For the Love of Lisa.

Have you loved your cuticles today?
 
Blogging tips